Best Cooking Methods for Back Ribs: Smoke, Grill, Bake, or Slow Cook?
Back ribs are a favorite among barbecue enthusiasts and home cooks alike, thanks to their tender meat and rich flavor. However, achieving perfectly cooked back ribs requires more than just quality ingredients—it demands the right cooking method. Choosing the proper technique can enhance the natural flavors of the ribs while ensuring they remain juicy, tender, and full of flavor.
In this article, we’ll explore the most popular methods for cooking back ribs: smoking, grilling, oven-baking, slow-cooking, and boiling. Each method has unique advantages and challenges, making it important to match the cooking technique with your preferences, available equipment, and time constraints. Whether you’re aiming for ribs with a crispy crust, a smoky aroma, or fall-off-the-bone tenderness, there’s a method here that will suit your needs.
Let’s dive into the details to find out which cooking method is truly the best for back ribs and how to perfect each one.
Beef Back Ribs: The Ultimate Guide to Perfectly Tender and Flavorful Ribs
Smoking Back Ribs
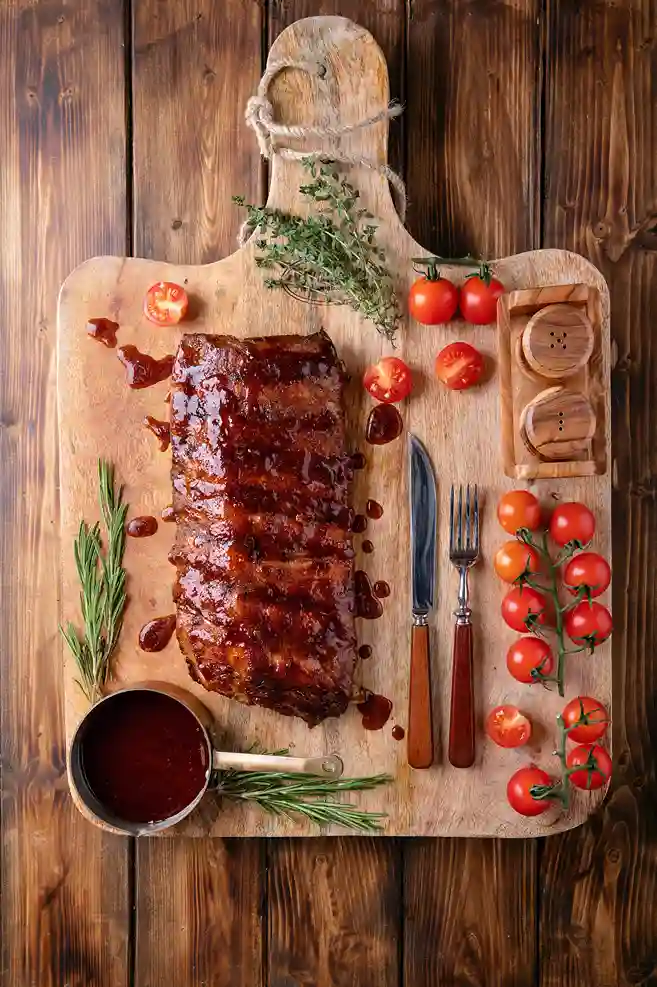
When it comes to achieving the ultimate flavor and tenderness, smoking back ribs is often considered the gold standard. This method infuses the ribs with a rich, smoky flavor while maintaining their juiciness, making it a favorite for barbecue enthusiasts. Though it requires time and patience, the results are undoubtedly worth it.
Benefits of Smoking Back Ribs
Smoking ribs allows for low and slow cooking, which breaks down the connective tissues in the meat and renders the fat, resulting in tender, flavorful ribs. The added smoky aroma from the wood chips or chunks gives the ribs a depth of flavor that is difficult to replicate with other methods.
Key benefits include:
- Enhanced flavor: Smoke from wood chips like hickory or applewood adds complexity.
- Tender texture: The low-temperature cooking process prevents overcooking and drying out.
- Customizable smoke profiles: Different woods provide varying levels of intensity and flavor.
Are Beef Back Ribs Tough? Tips for Tender Ribs
Tools and Techniques for Smoking
To smoke ribs successfully, you’ll need the following:
- A smoker or grill: A dedicated smoker (like an offset or pellet smoker) works best, but a charcoal or gas grill can also be adapted for smoking.
- Wood chips or chunks: Hickory, mesquite, cherry, and applewood are popular choices.
- Thermometer: To monitor both the internal temperature of the smoker and the meat.
- Rub and mop sauce: A spice rub adds flavor, while a mop sauce can keep the ribs moist during cooking.
Step-by-Step Smoking Process:
- Prepare the ribs: Remove the silver membrane from the back of the ribs to ensure better flavor absorption.
- Apply a rub: Generously coat the ribs with a dry spice mix of your choice. Common ingredients include brown sugar, paprika, garlic powder, and black pepper.
- Preheat the smoker: Maintain a temperature of 225°F (107°C) for optimal results.
- Add wood chips: Place soaked wood chips on the heat source to create smoke.
- Smoke the ribs: Place the ribs on the smoker’s grates, meat side up, and let them cook for 4–6 hours, depending on their size. Add wood chips periodically to maintain a steady flow of smoke.
- Monitor and mop: Check the ribs every hour, applying a mop sauce (a mix of vinegar, apple juice, and spices) to keep them moist.
- Finish and serve: The ribs are ready when they reach an internal temperature of 190–203°F (88–95°C) and the meat pulls away from the bones easily.
Best Wood Types for Smoking Ribs
The type of wood you use significantly impacts the flavor profile of the ribs:
- Hickory: Strong and bold, ideal for a classic barbecue taste.
- Applewood: Mild and slightly sweet, perfect for a delicate flavor.
- Mesquite: Intense and earthy, suitable for those who prefer a robust smoky flavor.
- Cherry: Sweet and fruity, often used in combination with other woods.
Experimenting with blends of wood can create a unique flavor signature that complements your spice rub and mop sauce.
Smoking back ribs may take several hours, but the results are unparalleled in flavor and texture. This method is best for those who appreciate the art of slow cooking and want to achieve restaurant-quality ribs at home.
Grilling Back Ribs
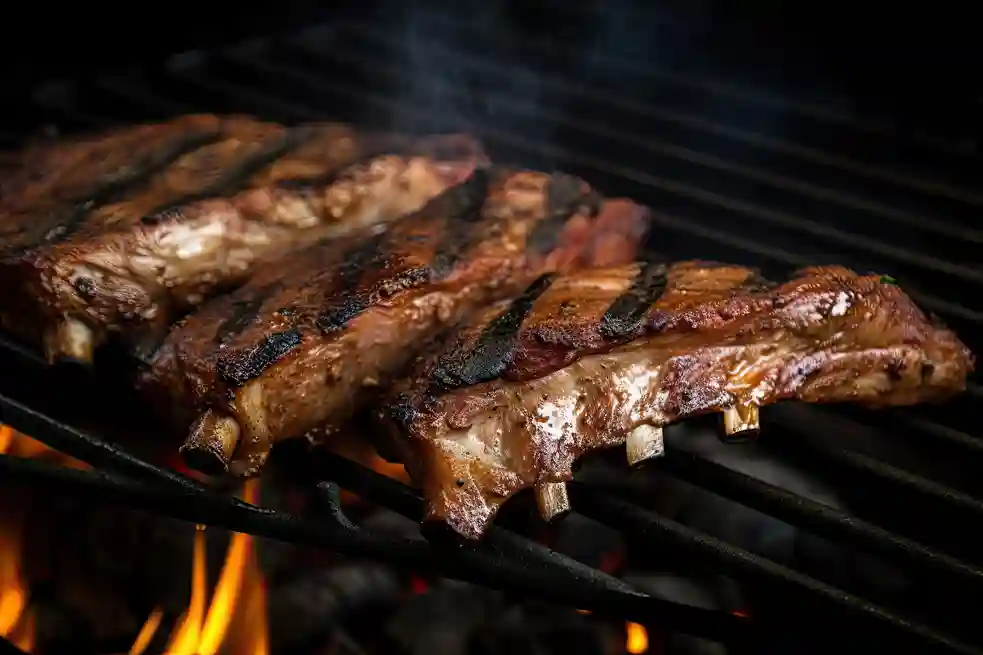
Grilling back ribs is a popular choice for those who want a smoky, charred flavor and a slightly crispy texture. This method is faster than smoking and can be done with either a charcoal or gas grill, making it accessible to most home cooks. When done correctly, grilled ribs can deliver a delicious balance of caramelization and juiciness.
Charcoal vs. Gas Grilling
The type of grill you use can significantly influence the flavor and ease of preparation.
- Charcoal Grill:
- Adds a classic smoky flavor that pairs beautifully with back ribs.
- Requires careful monitoring of the temperature and setup for indirect heat.
- Best for purists who prioritize authentic barbecue flavors.
- Gas Grill:
- Convenient and easy to control, making it ideal for beginners.
- Lacks the depth of smoky flavor unless wood chips or a smoker box is used.
- Perfect for quick, hassle-free grilling sessions.
Tips for Direct and Indirect Heat
Grilling back ribs requires a balance of direct and indirect heat to cook the ribs thoroughly without burning them.
- Indirect Heat Cooking:
- Use indirect heat for the majority of the cooking process. This means placing the ribs away from the flames to allow for slow and even cooking.
- On a gas grill, turn on one side of the burners and place the ribs on the opposite side.
- For a charcoal grill, push the coals to one side and place the ribs on the side without direct heat.
- Finishing with Direct Heat:
- Move the ribs over direct heat for the last 5–10 minutes to caramelize the glaze and add a crispy exterior.
- Watch closely to prevent burning.
Creating the Perfect Glaze
A glaze can elevate the flavor of grilled back ribs, adding a sweet, tangy, or spicy kick. Here’s how to create a simple and versatile glaze:
Basic Glaze Recipe:
- 1 cup barbecue sauce
- 2 tablespoons honey or brown sugar
- 1 tablespoon apple cider vinegar
- 1 teaspoon chili flakes (optional)
Application Tips:
- Apply the glaze in the final 15–20 minutes of grilling to avoid burning the sugars.
- Brush on multiple layers for a thick, sticky coating.
- Serve extra glaze on the side for dipping.
Step-by-Step Grilling Process
- Prepare the ribs: Remove the membrane, season with a dry rub, and let them sit at room temperature for 30 minutes.
- Set up the grill: Preheat the grill to medium heat (around 350°F/175°C) and arrange for indirect cooking.
- Cook the ribs:
- Place the ribs on the grill, bone-side down, over indirect heat.
- Close the lid and cook for 1.5–2 hours, flipping occasionally.
- Add glaze: During the final 20 minutes, brush the ribs with glaze and move them to direct heat for caramelization.
- Check doneness: The ribs are done when they reach an internal temperature of 190°F (88°C) and the meat pulls back from the bones slightly.
Grilling back ribs provides a wonderful combination of smoky flavor, crispy texture, and quick cooking times. It’s a versatile method that works well for backyard barbecues and weeknight dinners alike. With the right techniques, your grilled back ribs will be the highlight of any meal!
Oven-Baking Back Ribs
Oven-baking is an excellent method for cooking back ribs, particularly if you don’t have access to outdoor grilling or smoking equipment. This method offers consistency, control over temperature, and the ability to create tender, juicy ribs with minimal effort. Oven-baking is perfect for beginners or anyone looking for a reliable way to cook ribs.
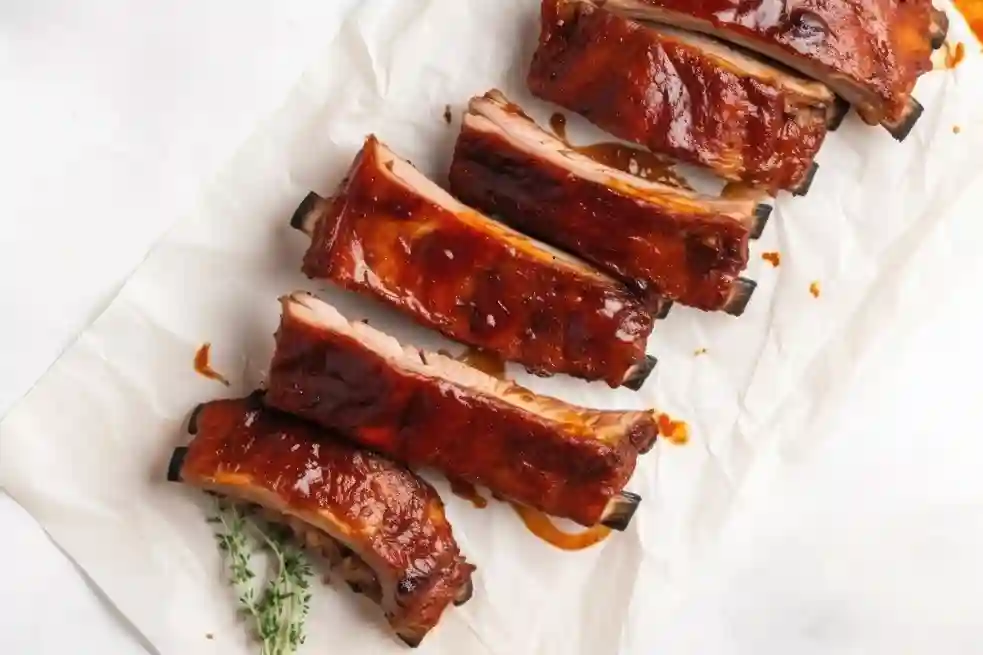
Advantages of Oven-Baking
Oven-baking comes with several benefits:
- Ease of use: Requires no specialized equipment, just a standard oven.
- Consistent results: Even heat distribution ensures perfectly cooked ribs every time.
- Customization: Easy to adjust seasonings, marinades, and cooking techniques to suit your taste.
Foil-Wrapped vs. Uncovered Ribs
There are two primary approaches to baking ribs in the oven, each producing a different texture.
- Foil-Wrapped Ribs:
- Wrapping the ribs in foil creates a steaming effect, which locks in moisture and makes the meat incredibly tender.
- This method is ideal for achieving fall-off-the-bone ribs.
- Recommended when cooking at lower temperatures (around 300°F/150°C).
- Uncovered Ribs:
- Baking the ribs uncovered allows the exterior to develop a caramelized crust.
- This method is better suited for ribs that will be glazed or finished with a sauce.
- Works well at slightly higher temperatures (350°F/175°C).
Time and Temperature Guidelines
To achieve perfectly baked ribs, it’s important to cook them low and slow. Here’s a general guide:
- Low and Slow Method (Tender Ribs):
- Temperature: 275°F (135°C)
- Time: 3–4 hours
- Best for: Foil-wrapped ribs or those cooked with a dry rub.
- Moderate Heat Method (Quicker Results):
- Temperature: 350°F (175°C)
- Time: 2–2.5 hours
- Best for: Ribs finished with a glaze or sauce.
For both methods, ensure the internal temperature of the ribs reaches 190–203°F (88–95°C) for optimal tenderness.
Step-by-Step Oven-Baking Process
- Prepare the ribs:
- Remove the silver membrane for better texture.
- Generously season the ribs with a dry rub and let them marinate for at least 30 minutes.
- Preheat the oven:
- Set the oven to your desired temperature (275°F or 350°F).
- Wrap or arrange the ribs:
- For foil-wrapped ribs: Place the ribs on a sheet of foil, add a splash of liquid (apple juice, beer, or broth), and seal tightly.
- For uncovered ribs: Place the ribs on a wire rack over a baking sheet to allow airflow.
- Bake:
- Cook the ribs for the specified time, checking for tenderness in the last 30 minutes.
- Apply glaze (optional):
- During the final 15–20 minutes, brush the ribs with your favorite barbecue sauce and bake uncovered for a caramelized finish.
- Rest and serve:
- Let the ribs rest for 10–15 minutes before slicing to allow the juices to redistribute.
Tips for Flavor Enhancement
- Dry Rubs: Use a mix of spices like paprika, brown sugar, garlic powder, and cayenne for a flavorful crust.
- Liquid Enhancements: Add a splash of apple cider vinegar or bourbon to the foil packet for an extra depth of flavor.
- Broiling Finish: For extra caramelization, place the ribs under the broiler for 3–5 minutes after baking.
Oven-baking is a foolproof way to cook back ribs, delivering tender, juicy, and flavorful results every time. It’s a versatile method that works well with a variety of seasonings and sauces, making it a favorite for both novice and seasoned cooks.
Slow-Cooking Back Ribs
Slow-cooking is one of the easiest and most reliable methods for preparing tender, fall-off-the-bone back ribs. Using a slow cooker or crockpot allows the ribs to cook gently in their own juices, ensuring maximum moisture retention and flavor infusion. It’s a set-it-and-forget-it method perfect for busy schedules or lazy weekend meals.
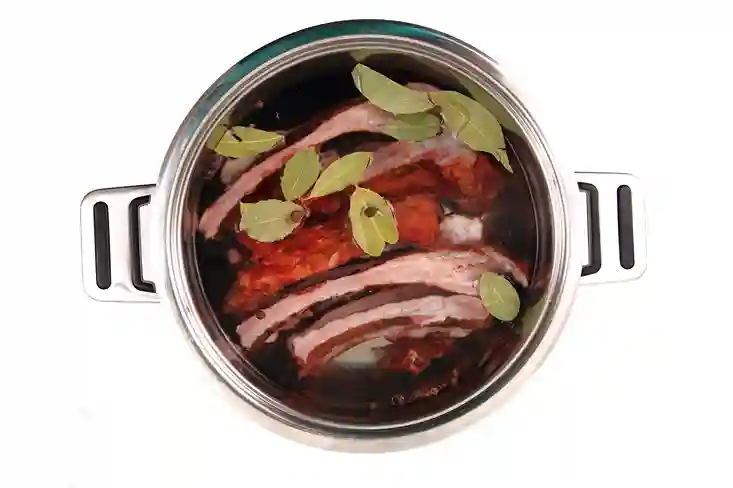
Benefits of Slow Cooking
Why slow-cooking is a fantastic choice:
- Effortless cooking: Once the ribs are in the slow cooker, there’s no need for constant monitoring.
- Consistent tenderness: The low, steady heat breaks down connective tissue, resulting in perfectly tender meat.
- Flavor infusion: Ribs cooked in a slow cooker absorb the flavors of marinades, sauces, and spices more effectively.
Ideal Slow Cooker Recipes
Slow-cooking allows for endless flavor possibilities. Here are some popular recipe ideas:
- Classic Barbecue Ribs:
- Season ribs with a dry rub made of brown sugar, paprika, garlic powder, and black pepper.
- Add barbecue sauce and a splash of apple cider vinegar to the slow cooker.
- Cook on low for 6–8 hours or on high for 4–5 hours.
- Asian-Inspired Ribs:
- Use a marinade of soy sauce, honey, ginger, garlic, and sesame oil.
- Add a bit of chicken broth to the cooker to prevent drying.
- Garnish with green onions and sesame seeds before serving.
- Spicy Cajun Ribs:
- Season with Cajun spices, cayenne pepper, and smoked paprika.
- Use a tomato-based sauce with Worcestershire and hot sauce.
- Serve with cornbread for a Southern-inspired meal.
How to Slow-Cook Ribs Step by Step
- Prep the ribs:
- Remove the silver membrane and season the ribs with your choice of dry rub or marinade.
- For better flavor, let the ribs marinate overnight in the refrigerator.
- Set up the slow cooker:
- Place a layer of sliced onions or carrots on the bottom to prevent sticking and enhance flavor.
- Add a splash of liquid (water, broth, apple juice, or beer) to the cooker for moisture.
- Add the ribs:
- Arrange the ribs in the slow cooker, either in a single layer or standing upright if space is limited.
- Cook:
- Set the slow cooker to low (6–8 hours) or high (4–5 hours), depending on your schedule.
- Avoid opening the lid frequently to maintain consistent heat.
- Finish the ribs:
- Transfer the ribs to a baking sheet and brush them with barbecue sauce or glaze.
- Broil for 5–10 minutes to create a caramelized crust.
- Serve:
- Let the ribs rest for a few minutes, then slice and serve with your favorite sides.
Tips for Maximizing Flavor
- Use aromatic vegetables: Add onions, garlic, or celery to the bottom of the cooker for an extra layer of flavor.
- Don’t skip the finishing step: Broiling or grilling the ribs after slow-cooking adds a crispy, caramelized texture.
- Layer your flavors: Combine a dry rub, liquid marinade, and glaze for multidimensional flavor.
Advantages and Disadvantages
| Advantages | Disadvantages |
|---|---|
| Hands-free cooking | Lack of smoky flavor compared to grilling or smoking. |
| Perfect for busy schedules | May require finishing for texture. |
| Consistently tender results | Limited to the capacity of the slow cooker. |
Frequently Asked Questions
What cooking method is used for back ribs?
Back ribs can be cooked using various methods, including smoking, grilling, oven-baking, slow-cooking, and boiling. The choice of method depends on personal preference, available equipment, and the desired texture and flavor. Smoking is favored for deep, smoky flavors, while grilling adds a charred crust. Oven-baking and slow-cooking are excellent for achieving tender, fall-off-the-bone results.
Are Beef Back Ribs a Good Cut? Tips, Benefits, and Cooking Methods
Which way is the best way to cook ribs?
The best way to cook ribs depends on your goals:
- For maximum flavor and tenderness: Smoking is the top choice, as it infuses the meat with smoky aromas while cooking it slowly.
- For convenience: Slow-cooking or oven-baking provides tender results with minimal effort.
- For a quick option: Grilling or boiling (followed by grilling) can yield delicious ribs in less time.
Is the 3-2-1 method the best for ribs?
The 3-2-1 method is a popular technique for smoking ribs and involves:
- 3 hours of smoking,
- 2 hours of cooking wrapped in foil, and
- 1 hour of unwrapped cooking with a glaze.
This method is effective for achieving tender ribs with a flavorful crust, but it works best for spare ribs or larger cuts. For back ribs, the timing may need adjustment to prevent overcooking, such as a 2-2-1 variation.
Are ribs better baked or grilled?
Both methods have their advantages:
- Baked ribs are easier to prepare, offering consistent heat and tender results. They’re ideal for home cooks without access to outdoor grills.
- Grilled ribs have a unique smoky, charred flavor and a crispy exterior, making them a favorite for barbecue enthusiasts.
For the best of both worlds, you can bake the ribs first for tenderness and then grill them to add a caramelized finish.
Conclusion
Each method for cooking back ribs has its strengths, making the choice largely dependent on your preferences, equipment, and time. Smoking offers unparalleled flavor, grilling delivers a charred crust, oven-baking provides consistency, slow-cooking guarantees tenderness, and boiling speeds up the process.
For a rich, smoky flavor and tender texture, smoking is the top choice. If time is a concern, slow-cooking or boiling combined with grilling or baking can achieve similar results. No matter which method you choose, the key to great back ribs is proper seasoning, controlled cooking, and finishing with a delicious glaze.
Beef Ribs vs. Beef Back Ribs: Differences, Tenderness, and Best Uses

