Should You Wash Shrimp Before Cooking?
Shrimp is a popular seafood delicacy enjoyed worldwide for its versatility, flavor, and health benefits. But are you supposed to wash shrimp before cooking? Whether you’re whipping up a quick stir-fry, preparing a pasta dish, or crafting an elegant shrimp cocktail, ensuring the shrimp is clean and ready to cook is crucial.
Washing shrimp helps remove unwanted particles, dirt, or residues, ensuring a clean and flavorful dish. However, the cleaning process varies depending on the type of shrimp and its preparation.
In this article, we’ll explore why washing shrimp is important, discuss the proper techniques for different types of shrimp, and provide step-by-step guidance to prepare shrimp like a pro. Whether you’re a seasoned chef or a beginner, this comprehensive guide will ensure your shrimp dishes are safe, hygienic, and delicious.
Follow this detailed guide to achieve perfectly grilled BBQ shrimp every time.
Why Wash Shrimp?
Washing shrimp is a fundamental step in preparing this seafood for cooking. While it might seem like a minor task, the benefits of washing shrimp are significant for both hygiene and taste. Here’s a closer look at why it’s essential to wash shrimp before cooking:
Hygiene and Food Safety
Shrimp often come into contact with various contaminants during harvesting, processing, and transportation. Washing shrimp ensures that any dirt, debris, or residues are removed, reducing the risk of foodborne illnesses.
- Surface Contaminants: Shrimp might have traces of sand, mud, or other impurities on their shells, especially if they are wild-caught.
- Chemical Residues: Some shrimp are treated with preservatives like sodium bisulfite to maintain freshness. Washing helps remove surface traces of these chemicals.
- Bacteria: While cooking destroys bacteria, washing shrimp beforehand minimizes the transfer of bacteria to cutting boards and utensils.
Enhancing Flavor and Texture
Clean shrimp not only look more appealing but also taste better. Removing dirt or lingering residues ensures the natural flavor of the shrimp shines through.
- No Grit in Your Dish: Sand or grit can ruin the texture of shrimp dishes. Washing ensures a smooth, clean bite.
- Preserving Freshness: Rinsing shrimp under cold water helps refresh their surface, maintaining their crisp texture during cooking.
Removing Unwanted Elements
Shrimp, particularly raw or shell-on varieties, often come with unwanted parts that need to be removed before cooking. Washing makes this easier and more thorough.
- Shrimp Veins: The “vein” in shrimp is actually its digestive tract and may contain waste. Washing helps loosen it for easier removal.
- Loose Shells or Legs: Washing can dislodge any leftover shell fragments or legs that might remain after peeling.
Health Concerns
Neglecting to wash shrimp can lead to potential health issues. Unwashed shrimp may carry:
- Harmful Pathogens: Bacteria like Salmonella or Vibrio, which thrive in seafood, can pose a health risk.
- Allergens or Irritants: Chemical residues or surface impurities might cause reactions in sensitive individuals.
Do All Shrimp Need Washing?
Not all shrimp require the same level of washing. While raw shrimp typically need thorough rinsing, pre-cooked or peeled varieties might only need a quick rinse. We’ll explore this further in the next section on cleaning methods for different types of shrimp.
Types of Shrimp and Cleaning Methods
The process of washing shrimp depends on the type of shrimp you’re working with. Each variety requires specific cleaning methods to ensure it’s safe, hygienic, and ready for cooking. Let’s dive into how to handle different types of shrimp.
1. Raw Shrimp with Shells On
Shrimp with their shells intact are common in seafood markets and grocery stores. They often come with their heads, tails, and legs still attached, which makes cleaning a bit more involved.
Cleaning Steps:
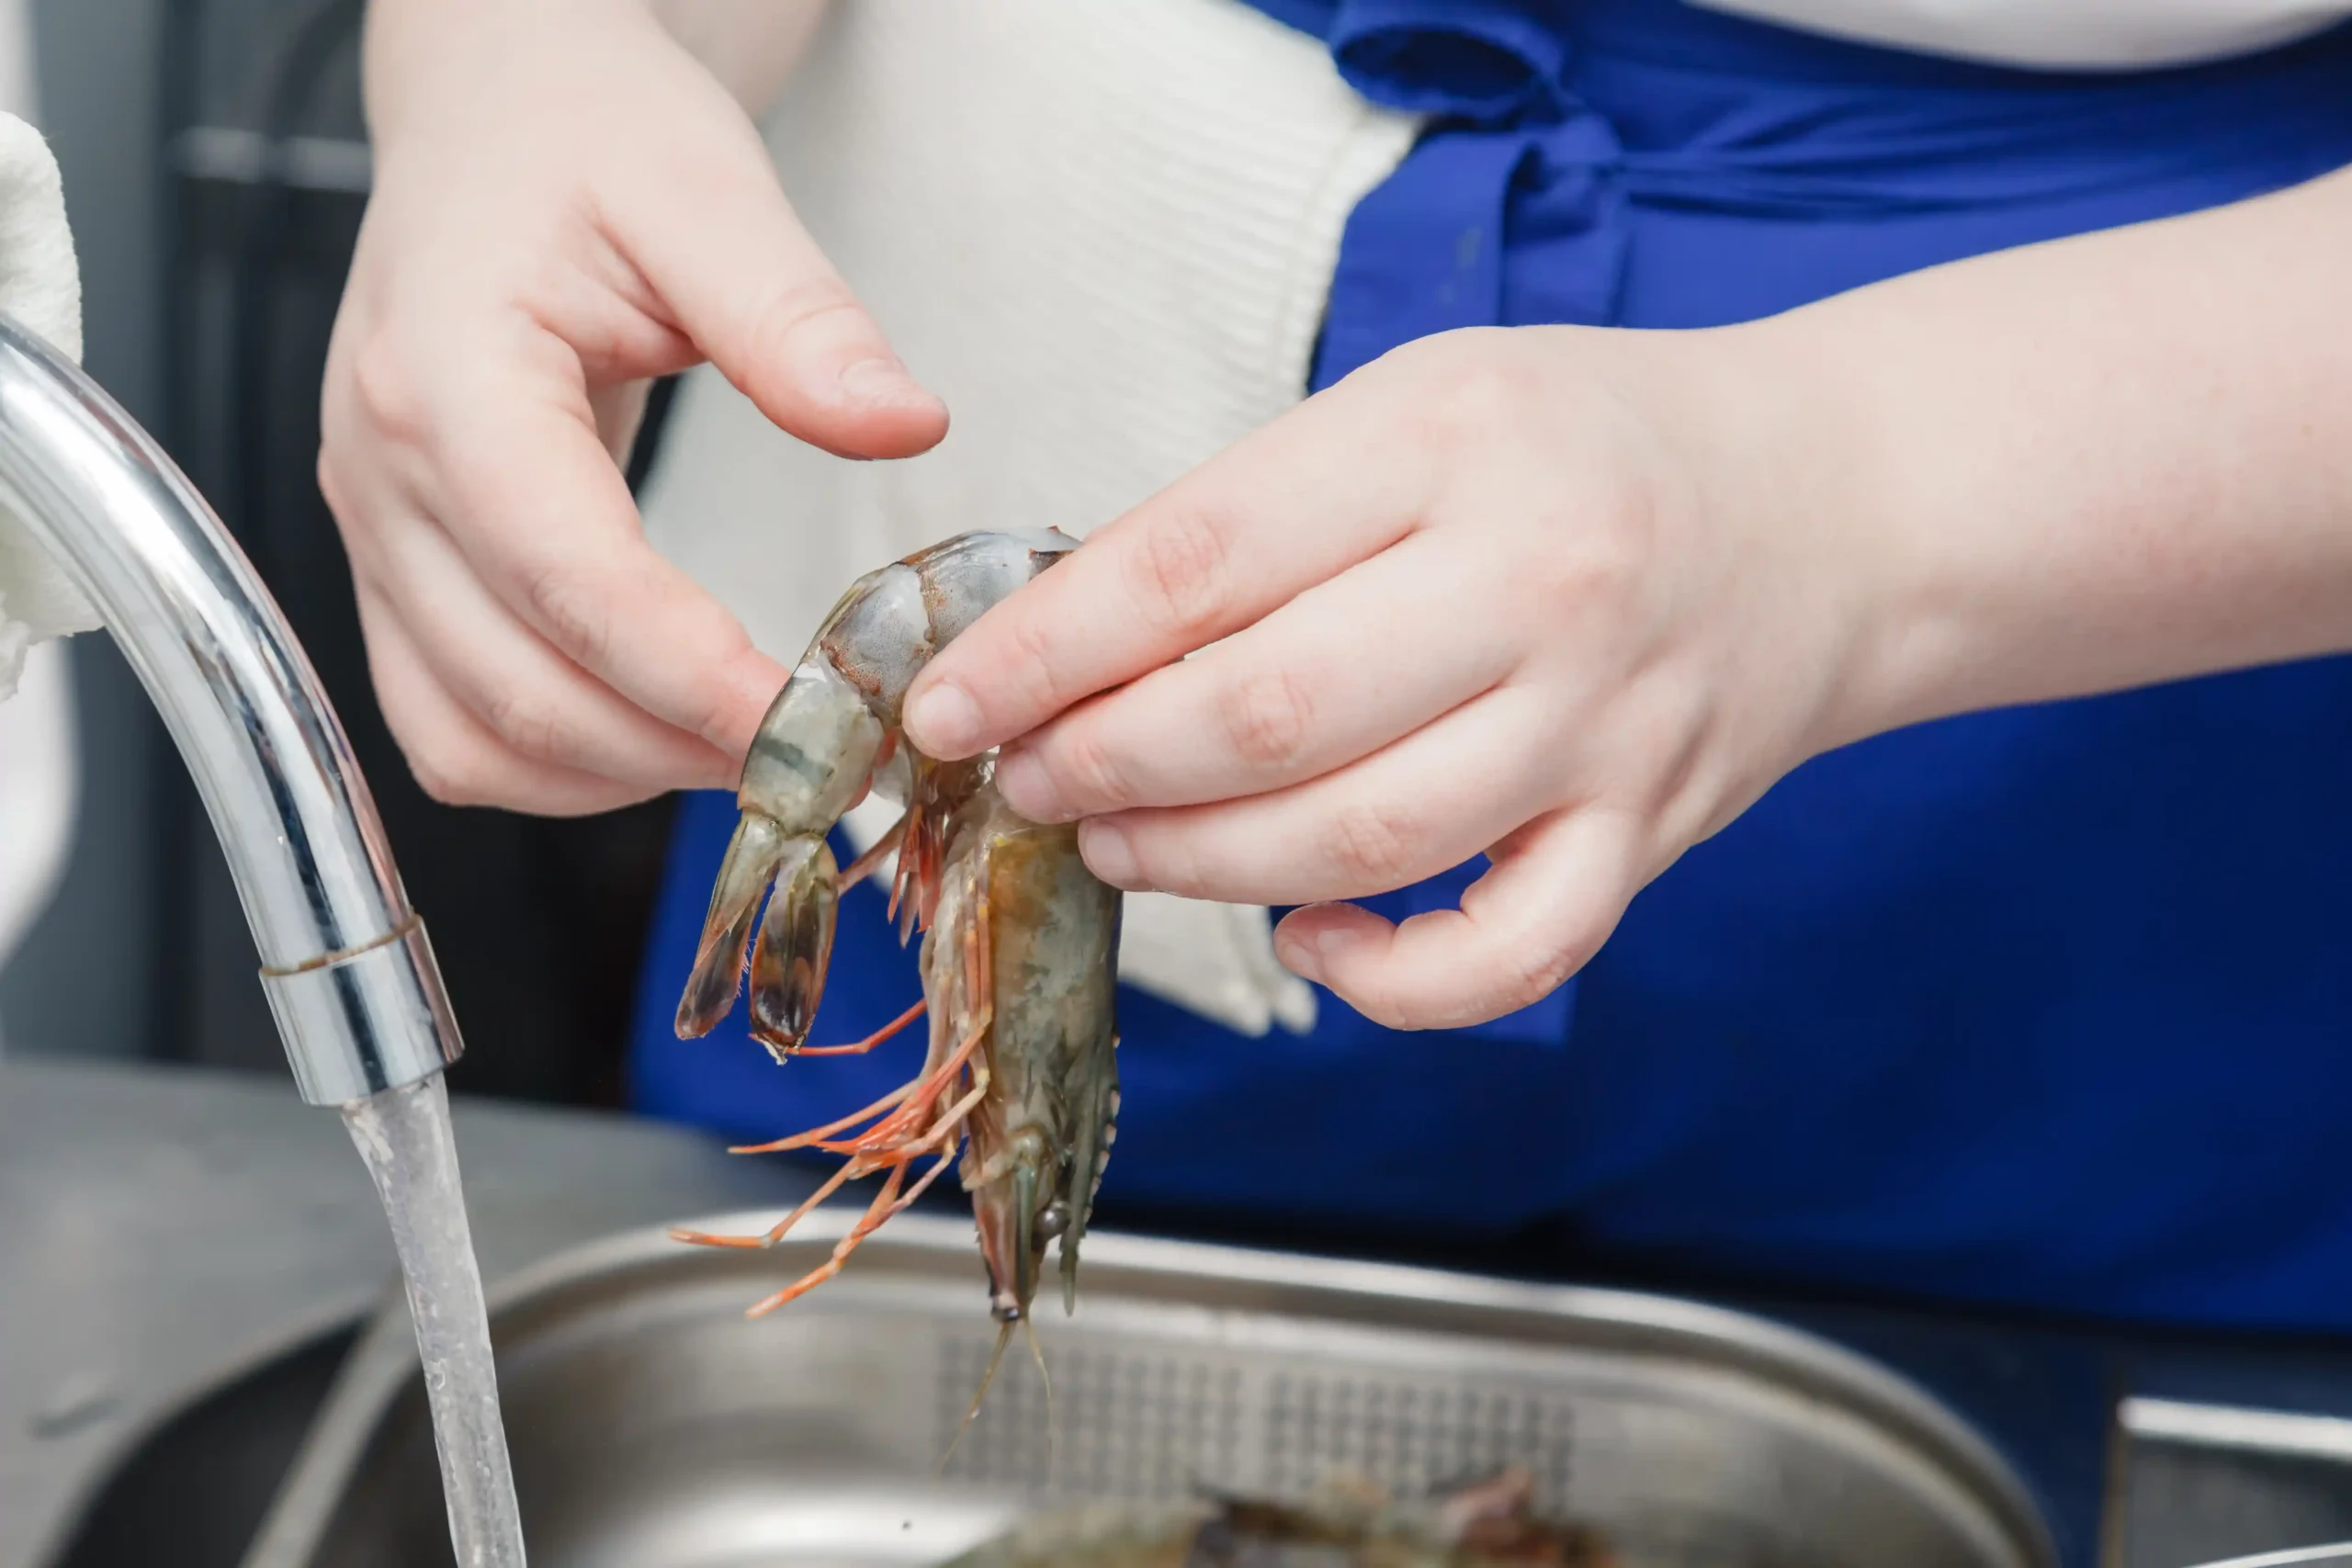
- Rinse Thoroughly: Place the shrimp in a colander and rinse under cold running water to remove dirt and surface residues.
- Remove Shells (Optional): If your recipe requires peeled shrimp, remove the shells by gently pulling them off, starting from the legs. Leave the tail on if it’s for presentation.
- Devein the Shrimp: Use a small paring knife or a deveining tool to make a shallow cut along the back of the shrimp and remove the black vein.
- Rinse Again: After deveining, rinse the shrimp one more time under cold water to ensure all debris is washed away.
Best Practices:
- Keep Them Cold: Always use cold water to maintain the shrimp’s freshness.
- Discard Unused Parts Properly: Dispose of the shells, heads, and tails in a sealed bag to prevent odors.
2. Peeled Raw Shrimp
Peeled raw shrimp have their shells and legs removed but may still include the vein. They are slightly easier to clean since much of the preparation is already done.
Cleaning Steps:
- Quick Rinse: Run the shrimp under cold water to remove any surface residues.
- Devein if Necessary: Check if the vein is still intact. If so, make a shallow cut along the back and pull it out.
- Pat Dry: After washing, pat the shrimp dry with a clean paper towel before cooking.
3. Pre-Cooked Shrimp
Pre-cooked shrimp are a convenient option that has already been cooked and sometimes deveined. These shrimp generally require minimal cleaning.
Cleaning Steps:
- Inspect for Debris: Check for any leftover shell fragments or visible veins.
- Rinse Gently: Give the shrimp a quick rinse under cold water to refresh them.
- Dry Before Use: Pat the shrimp dry before adding them to your dish, as excess water can dilute flavors.
4. Frozen Shrimp
Frozen shrimp, whether raw or cooked, are widely available and need to be thawed and rinsed before use.
Cleaning Steps:
- Thaw the Shrimp: Place the shrimp in a colander and run cold water over them until they are fully thawed (usually 5-10 minutes).
- Rinse Well: After thawing, rinse the shrimp under cold water to remove any ice crystals or freezer residue.
- Clean as Needed: If the shrimp are raw, follow the steps for shell-on or peeled shrimp to remove the vein.
Avoid These Mistakes:
- Do Not Use Warm Water: Warm water can cause the shrimp to partially cook during thawing, leading to an uneven texture.
- Avoid Over-Thawing: Use only the amount of shrimp you need to prevent waste and maintain quality.
5. Shrimp with Tails On
Shrimp with tails on are often used for presentation in dishes like shrimp cocktails or stir-fries. While the tail adds aesthetic value, it doesn’t change the cleaning process.
Cleaning Steps:
- Rinse Well: Wash the shrimp under cold water, focusing on the tail area to remove any lingering debris.
- Leave Tail On: Keep the tail intact unless the recipe specifies otherwise.
Why Different Cleaning Methods Matter
Each type of shrimp requires specific cleaning techniques based on its preparation state. Proper cleaning ensures:
- Optimal Flavor: Removing impurities prevents unpleasant tastes.
- Better Texture: Grit or debris can ruin the dish’s texture.
- Health and Hygiene: Clean shrimp minimizes the risk of contamination.
Step-by-Step Guide to Washing Shrimp
Washing shrimp may seem straightforward, but following a proper step-by-step process ensures that your shrimp are clean, safe, and ready for any dish. Below is a detailed guide to washing shrimp, regardless of type.
Enhance your BBQ shrimp experience with perfectly paired side dishes.
1. Gather Your Tools and Ingredients
Before you start cleaning, ensure you have everything you need:
- Shrimp: Raw or pre-cooked, fresh or frozen.
- Colander or Strainer: For rinsing the shrimp.
- Paring Knife or Deveining Tool: To remove the vein.
- Cutting Board: A clean surface to work on.
- Cold Water: Essential for rinsing and maintaining freshness.
- Paper Towels: For drying the shrimp after cleaning.
2. Thaw the Shrimp (If Frozen)
Frozen shrimp must be thawed properly before washing and cooking.
Steps to Thaw:
- Place the shrimp in a colander or bowl.
- Run cold water over the shrimp until they are fully thawed. This process usually takes about 5-10 minutes.
- Pat the shrimp dry with a paper towel to remove excess water.
Pro Tip: Avoid thawing shrimp at room temperature or using warm water, as this can compromise food safety.
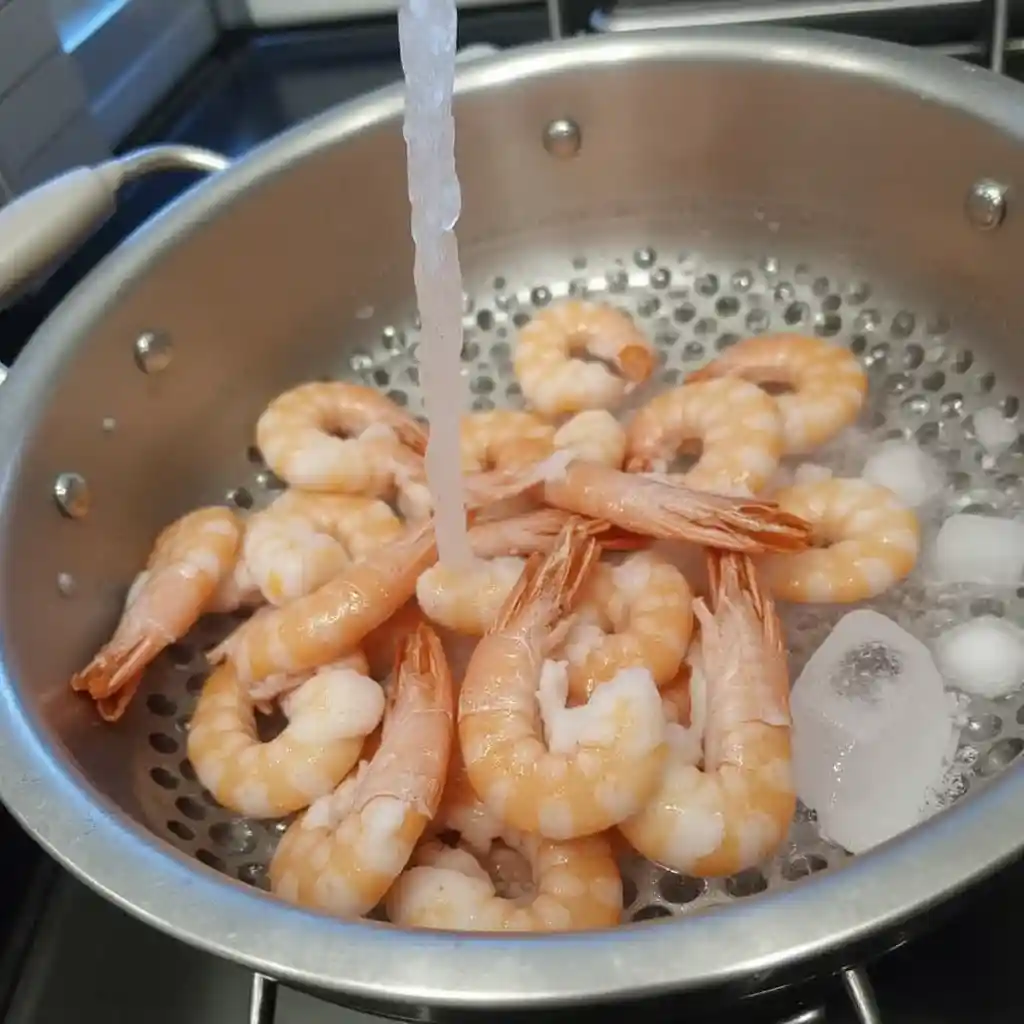
3. Rinse the Shrimp Under Cold Water
Whether fresh or thawed, all shrimp should be rinsed to remove dirt, surface residues, or ice crystals.
How to Rinse:
- Place the shrimp in a colander.
- Run cold water over them, gently moving the shrimp around to ensure all surfaces are rinsed.
- Inspect for any remaining debris, like sand or shell fragments.
4. Devein the Shrimp (If Necessary)
The dark vein running along the back of a shrimp is its digestive tract and may contain waste. While not harmful, it can affect texture and appearance.
Steps to Devein:
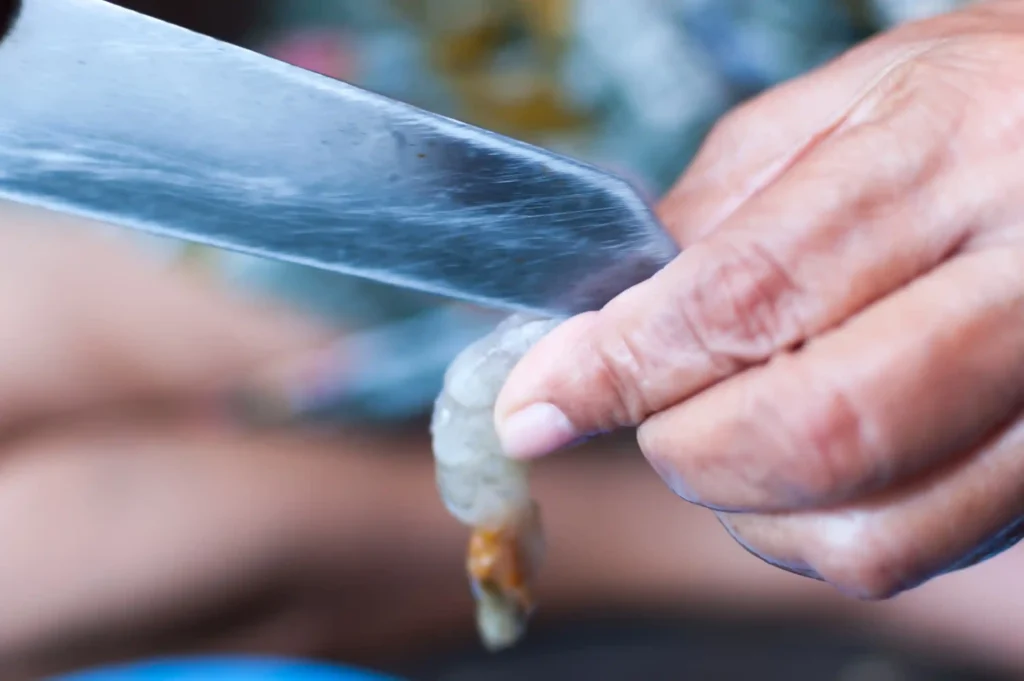
- Make a Cut: Using a paring knife, make a shallow cut along the back of the shrimp.
- Locate the Vein: Look for the dark line running just beneath the surface.
- Remove the Vein: Use the tip of the knife or your fingers to pull out the vein.
- Rinse Again: After deveining, rinse the shrimp under cold water to wash away any remaining residue.
Tip for Easy Deveining: A specialized deveining tool can make this process faster and easier, especially when cleaning large quantities.
5. Remove the Shell and Tail (Optional)
Depending on your recipe, you may need to peel the shrimp and remove the tail.
How to Peel Shrimp:
- Start at the legs: Gently pull them off.
- Peel the shell: Work from the bottom, peeling upward toward the back.
- Leave or remove the tail: For presentation, you might keep the tail on; otherwise, pinch it gently to remove.
6. Inspect the Shrimp
After rinsing, take a moment to inspect the shrimp for:
- Leftover Shell Pieces: Remove any fragments that might still cling to the meat.
- Grit or Sand: Check the tail area, where dirt might hide.
- Uneven Deveining: Ensure all veins have been removed.
7. Final Rinse and Dry
Give the shrimp one final rinse under cold water to remove any remaining debris or loosened particles.
Drying the Shrimp:
- Lay the shrimp out on a clean paper towel.
- Pat them dry to remove excess moisture. This step is especially important if you’re grilling or frying the shrimp, as excess water can cause splattering or prevent browning.
8. Prepare for Cooking
Once cleaned and dried, your shrimp are ready for cooking. Store them in the refrigerator if you’re not using them immediately, but avoid leaving them out at room temperature.
Why This Process Matters
Taking the time to thoroughly wash shrimp ensures:
- Improved Safety: Eliminates bacteria and contaminants.
- Better Taste: Removes unpleasant grit or residues.
- Optimal Cooking: Clean shrimp cook evenly and have a better texture.
Deveining Shrimp – Why It Matters and How to Do It
Deveining shrimp is an important step in preparing this popular seafood. While some recipes or cooking methods might not require it, understanding why and how to devein shrimp ensures your dishes are both appetizing and hygienic.
Why Deveining Matters
The “vein” in shrimp is the digestive tract, which runs along the back of the shrimp. Although it isn’t harmful to consume, there are several reasons to remove it:
1. Aesthetic Appeal
- The vein can appear as a dark or gritty line, which may be unappealing to diners.
- Removing it ensures a cleaner, more attractive presentation, especially in dishes where the shrimp are served whole.
Explore creative ideas for serving BBQ shrimp that everyone will enjoy.
2. Texture and Flavor
- The vein may contain sand, grit, or undigested food, which can affect the shrimp’s texture and flavor.
- Removing it prevents a gritty bite, enhancing the overall experience of the dish.
3. Hygiene Concerns
- While cooking destroys bacteria, the contents of the vein can still contribute to off-flavors or an unpleasant odor.
Do You Always Need to Devein Shrimp?
The decision to devein shrimp depends on the size and preparation of the shrimp:
- Small Shrimp: In small shrimp, the vein is usually thin and less noticeable. Deveining is often unnecessary.
- Large Shrimp: In larger shrimp, the vein is more prominent, making it essential to remove for visual and textural reasons.
How to Devein Shrimp: Step-by-Step Guide
Deveining shrimp is a straightforward process, but having the right tools and technique can make it even easier.
1. Tools You’ll Need
- A paring knife or deveining tool.
- A clean cutting board.
- A bowl of cold water for rinsing.
2. Start by Preparing the Shrimp
- Shell-On Shrimp: Make a shallow cut along the back of the shrimp with a paring knife. This cut will expose the vein.
- Peeled Shrimp: If the shrimp are already peeled, locate the vein directly and prepare to remove it.
3. Locate and Remove the Vein
- Gently lift the vein using the tip of your knife or a deveining tool.
- Pull the vein out, being careful not to break it.
- If the vein breaks, rinse the shrimp under cold water to remove any remaining pieces.
4. Rinse Thoroughly
After removing the vein, rinse the shrimp under cold running water to wash away any loosened debris or residue.
Alternative Deveining Methods
If you’re short on time or don’t have a paring knife, there are a few other ways to devein shrimp:
- Using a Toothpick: Insert a toothpick just beneath the vein and lift it out. This method works best for peeled shrimp.
- Specialized Deveining Tools: These are designed to quickly cut and remove the vein in one motion, ideal for large batches of shrimp.
What Happens If You Don’t Devein Shrimp?
Skipping the deveining process won’t necessarily harm you, but it can affect the quality of your dish:
- Unpleasant Grit: Sand or grit in the vein may create an undesirable texture.
- Off-Flavors: Waste in the vein can add bitterness or an earthy taste to the shrimp.
Is Deveining Necessary for Every Dish?
In some recipes, such as shrimp stock or soup, deveining might not be required, as the vein won’t impact the final product. However, for dishes where shrimp is a prominent component—like shrimp cocktails, pasta, or stir-fries—deveining is strongly recommended.
Pro Tips for Easy Deveining
- Work with Fresh Shrimp: Fresh shrimp are firmer and easier to devein than thawed or overripe ones.
- Keep a Bowl of Water Nearby: This helps rinse your hands and tools during the process.
- Use Bright Lighting: Proper lighting makes it easier to see the vein, ensuring thorough removal.
FAQs About Washing Shrimp
Do you need to wash raw shrimp before cooking?
Yes, washing raw shrimp is essential before cooking. This step removes dirt, grit, and any surface residues from the shrimp, ensuring it’s clean and safe to eat. If the shrimp are shell-on, washing also makes it easier to devein and peel. Always use cold water to rinse the shrimp thoroughly.
What happens if you don’t rinse shrimp?
If you don’t rinse shrimp, you risk having dirt, grit, or even chemical residues in your dish. Unwashed shrimp can introduce an unpleasant texture and flavor. Additionally, failing to clean shrimp properly increases the chance of cross-contamination when using utensils or surfaces that touch unwashed seafood.
Do you rinse shrimp after buying?
Yes, rinsing shrimp after buying is recommended, whether they are fresh or frozen. For fresh shrimp, rinsing removes any debris, slime, or surface bacteria. For frozen shrimp, rinsing helps eliminate ice crystals and freezer residues. Even pre-cooked shrimp benefit from a quick rinse to ensure freshness.
Is it okay to not clean shrimp?
While it’s technically safe to cook unwashed shrimp (as cooking kills bacteria), it’s not ideal. Uncleaned shrimp may have grit, sand, or waste that can affect the flavor, texture, and overall quality of your dish. For the best results, always clean and devein shrimp before cooking, especially for recipes where the shrimp is a focal point.
Learn how to prepare your grill for a seamless BBQ shrimp cooking session.
Conclusion
Washing and cleaning shrimp is a critical step in preparing this seafood staple for cooking. Whether raw, cooked, fresh, or frozen, properly rinsing shrimp removes dirt, grit, and unwanted residues, ensuring your dish is both safe and delicious. Deveining shrimp, while optional for smaller varieties, significantly enhances the presentation, flavor, and texture of larger shrimp.
By following proper cleaning methods and taking the time to rinse thoroughly, you’ll elevate the quality of your shrimp dishes and enjoy a more flavorful dining experience. Clean shrimp not only look better but also cook more evenly and taste fresher, making the effort well worth it.
Happy cooking and enjoy your perfectly prepared shrimp!
